2/20/2015

The Search for the Great Suspension - Control Arms, Lollipops - Part 1

  Many an evening has been spent pouring over the BMW related forums. Looking intently for that rightly priced front suspension components to replace poor Helena's tired front end.

What needs replacing:
-Both front struts
-Both strut mounts
-Ball joint on passenger side lower control arm.
-Both front lollipops.

  The front end on the E36 has lower control arms shaped like a "L" One end has the ball joint which connects to the spindle. The other slides in a round bushing. This is the lollipop. Named as such because it well, looks like a lollipop. In the middle of this control is another ball joint that is attached to the sub frame. 

For reference. The M3 has the longer blue end link for the sway. All other models use the shorter red one, that attaches to the lower control arm. Picture Reference Link.
  These particular areas wear quickly. BMW specifies a check of these areas in the inspection II process. Most sites/forums/people will tell you that E36 struts only last about 30-60k before needing to be replaced. Some of the ball joints are actually made of a plastic material. Over time they deform causing the tire to move during cornering and shimmy going straight. Tie rod ends have similar problems. Definitely not good things.

  My search for a quality replacement lower control arm lead me to Bimmerworld*. They had the best price, at that time, on the Meyle HD control arm. These have upgraded, hardened, full metal ball joints in them. Better able to handle the stresses of the front end. They also have lollipops and are willing, for a charge, to press the bushings in for you. Since I don't have a press at this time, that way was a no brainier. I don't want to go crazy with poly but, I wanted to give these a shot this time around.

  As a side note if you are running poly bushings in the lollipops, I hear you fall into a different class in the SCCA. I'm not an expert in the area so don't quote me. Since I will have a full spare set of lollipops I can get them ready for the next go around. It was a win win for me.

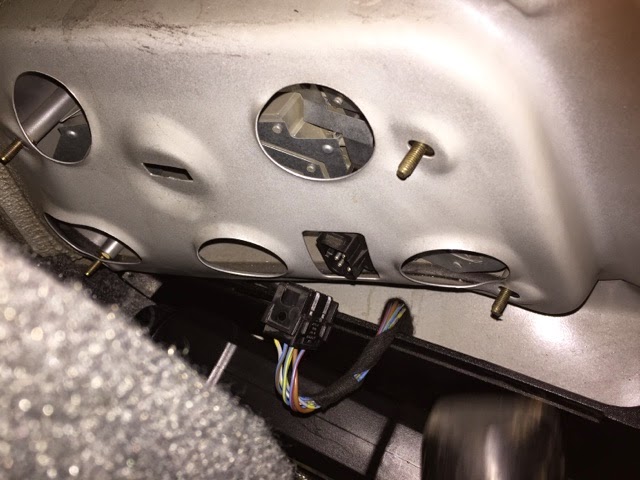
  Bimmerworld had a special going on as well. So I ended up scooping up a few other things. One of which included Z3/M3 front shock tower reinforcement plates. 

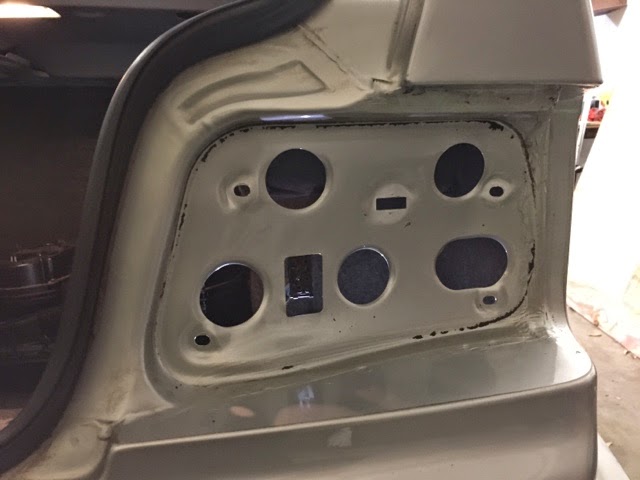
  The front towers can be a weak point for this chassis. The plates spread the forces exerted more evenly across the whole of the tower. I'm not really sure they are necessary for me, as I'm not planning on making the suspension super hard. This will be a daily driver, for at least now anyway. I figure the piece of mind up front was worth the pennies.


  -Front control arms with ball joints, check.
  -New lollipops with bushings, check.
  -Front strut reinforcement plates check.

* Here is the direct link for the suspension overhaul page: e36 Suspension Overhaul.
   Good info about all of this stuff here as well: e36m3blog. This blog post is very well put together, kuddos to the author.

2/11/2015

E36 OEM Head/Tail Light Assembly Install

  After much anticipation I've finally got my new/used headlights installed. I made a plan for Friday night for the install time. I picked up some wings for the "event" which I entitled "wings and workings". The headlights were the primary agenda, followed by OEM taillights, and possibly Harmon Kardon 6x9s for the rear. These were in original OEM boxes and were on good shape. The speaker installation is super straight forward but, I'll save that for later.

  My good friends Eric and Jeremy came over to hang and help with the installations. We all got off to a slow start. Eric decided that my weird indie dance music Pandora station was not up to par. He created some 80s montage station which was actually pretty good. So with some food in our bellies and some decent tunes we got to it.

  Headlights 

  Jeremy started by helping remove the eBay headlights. There were four 8mm bolts holding the lights in. One left and right, and two on top. 

The passenger side light cover was separating from the housing. Jeremy discovered it was a broken clip on the underside. He was able to pull them apart very easily.

Thankfully these eBay lights also came with harnesses so, not hacked wiring. Nice!

  The halos that were wired into the corner light housing were soldered in place. This was nice because I could wire my city lights using the same cables. Since there were two sets of halos on the one headlight I had four total wires. I only needed two. I clipped the two extras off and wrapped the wires in electrical tape.

The other two were used for the city light. Black to black, brown to white. Some solder and some heat shrink later and I have working city lights and a clean install.


  The hardest part for me was getting the 5 adjusters to set properly. I ran the two lower ones on the left and right all the way down. The lights seem to sit very well with them that way. I'll definitely have to do some alignment as well for them. They have two separate adjustment for pivoting left to right and up and down.


Rear tail lights

  So I'm told that rear tail lights on these are a hard thing to remove. Eric and Jeremy had to beat out the old lights with a hammer. No seriously, they had to beat them out. The seals seem to adhere themselves quite substantially. We thought they were glued in place.


  There are four 8mm bolts holding the tails in place. Or at least there should be. I was missing two from the passenger side for some reason. Even with the two missing bolts we had to hammer the studs to get the lights off the car. 


  Then, some simple clean up of the area under the lights. Eric made quick work of this. Take the bulbs out of the old tail light, put them in the new/used tail light. Then slide it into place. Bolts back in. Done.


  There appeared to be some rusted loose metal in the driver side tail light. It looks like perhaps the remnants of the a reflector perhaps? That was right where the crack in the housing was. You can also see where the rust had started eating through the metal on the backside of the light. This is where the bulbs make contact to get their power. My On Board Computer (OBC) would always tell me I had a tail light out. Not anymore! Except sometimes if it's cold and raining. Anyways, I'm happy to have a set of stock, not broken tails out back. 

2/10/2015

After Market Head Unit Install - Beats by Dr. Brizow

  The stereo in Helena has always sounded kind of like it was under water. There was no treble, and very little low end. I'm not the kind of stereophile guy who needs it to be perfect but, I'm surprised by the lack of quality from the 10 speaker system Helena came with. This is not the mac daddy Harmon Kardon system just the standard Hifi system. In researching further this seems to be a very common complaint from owners. I'm assuming that Germans didn't need to listen to the radio when they have the sweet sound of a 2.8 inline 6 purring down the autobahn. I'm not that lucky.

  So I started at the easiest place, change the head unit. You need two things for this: a radio adapter harness and an antenna adapter.

  There are several styles of antenna adapters out there. Given there is so little room behind the head unit, I went with an a pastor that had no pigtail. It simply plugs into the stereo flush and then, accepts the Nokia/euro style antenna plug.


  There is very little room behind the head unit for extra wires. This was the hardest part of the install for me. There is a vent and a backing plate the head unit rests on. On the back of the stock head unit there is a small plastic piece protruding proudly. This slides in to the hole on the backing plate.


  The pioneer head unit I had laying around did not have a hole big enough to accept the threads on the proudly protruding plastic piece. So, I ended up using a bolt that would fit and, wrapped it in e-tape. It worked fine for me. Little non factory approved as well. Eh.

  I had to eventually had to press the wires and the harness for the stereo gently back towards the left side of the din opening. It's also a tight spot but I found the harness and adapter would slide in. From what I can tell the whole harness is in between the dash cluster surround and the open space below. There is a cable that drives the air temperature from the center most vent. The harness was getting caught on it. After a twist of the harness as a whole it was like the harness I made was meant to fit there. Seriously, I struggled to get the head unit in there was a good bit. What finally brought it together was spinning the whole harness 360'. Weird. If you don't want to tear up stuff patience was definitely key for this one. 


Comparisons:
 The stock head unit has Amber back lights. The pioneer does not. The pioneer also has a removable face plate which doesn't really fit well into the space provided. The stock tape deck also provided control for the trunk mounted 6 disc changer. Unfortunately the previous owner/s lost the cartridge for it, making it useless right now. I don't really listen to CDs anymore anyway but, on occasion it is nice to have.

  At the end of all of this how does it sound? Well honestly it sounded almost exactly the same as the stock HU (head unit). However the Pioneer has more equalizer settings built in. With this I was able to get more mid and tweets out of the stock speakers. This was good. It made the install worth it to me.

  Now supposedly per the Internets my amp will die any moment because the signals from the stock unit are different than after market one. This is possible but, is that a bad thing? The stock amp does serve a purpose and honestly for 1998, I don't know too many other vehicles with 10 separated, amplified (all be it only slightly) speakers, and a CD changer. BMW didn't do a terrible job at all.

  The problem for me is that my wife's 00 Saturn with a factory tape deck and four speakers; sounds clearer and has more bass than my "luxury sport" mobile with 10. :/ I digress. Moving forward I'd like to try a few things to sort that out. If one bypasses the stock amp then, you will need to cross over the signals going to the front speakers. High, mid, low. A three way cross over.

  The rear deck speakers whether 4in or the hk 6x9s, have the sub and the tweet mounted separately. A two way cross over would be needed here.

  Would new coaxial style 6x9s without amplification sound better off the aftermarket HU? No cross over needed you can just send the full signal straight to the speaker. The rear makes sense and is easy to get at. The fronts however are not. 

  All the speakers wires do route to the amp mounted in the trunk. It's on the drivers side behind the carpeting. Accessing all the incoming and outgoing wires makes thoughts of aftermarket amps or bypassing it altogether easy. I just don't want to hack up and wiring.

  Clearly I'm still working through what to do in this area. More to come on this subject.

After thoughts: 

  If I was going to spend money on a fancy new head unit, it would have to have color adjustment to match the interior. No silver on it either. Black or grey only.

  All the stock speakers run through the factory "amp" which works as a crossover for the speakers and an amp for the "subs." 5.25s in the kick panels. 4s on the deck.

  Changing the amp or, running an amp bypass seems to be the preferred method depending on your budget and the quality of sound you are looking for.

  Not blown speakers will always sound better than blown ones.