Installation
Tools needed:
- 6mm Allen
- 7mm Allen
- 17mm socket
- 16mm socket
- Short extension
- Socket wrench of choice
- Breaker Bar/Impact Gun
- Lube
- Brake Cleaner
- Large Screw Driver
- Hammer
Optional
- Bolt loosening spray
Obviously we are going
to jack the car up. Please be safe, make sure the car with not roll while being
jacked up. Use a jack stand. You know the normal precautions. Remove the front
wheel(s).
There are
two 16mm bolts holding the caliper in place. In this picture, on the drivers
side, see that black wire? That is the wear sensor. These are on one side only
in this case the driver's side. What these do is: when the material on your
brake pads gets worn away, eventually these come in contact with the rotor.
When that happens you will see a light on your dash informing you of
such. So you may need a
new pad wear sensor if this has already happened.
You could also upgrade your brake pads, rotors, or lines. That is entirely up to you. Swapping rotors or pads is an easy go. Getting into lines, or calipers involves brake bleeding. Every car guys favorite activity of course. One word, quality power bleeder. Made life better for me.
Given the caliper is sitting out further I was worried about the wear sensor wire being too short. This was not the case. Getting the wear sensor off, whilst holding the caliper in hand, can be a little tricky. Patience and a strong arm is key.
 |
| Stock E36 Rotor, Bracket, and Caliper. |
 |
| E46 Rotor, Bracket, and E36 Caliper Installed. |
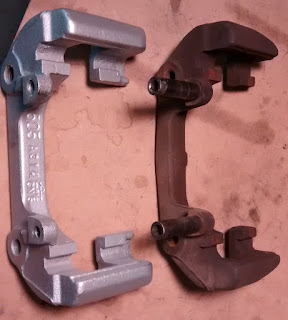
Installed. Wait, I thought you said you had painted the caliper as well? Yes, I did, however, someone is borrowing my compressor and I did not have the time, nor the assistance to foot bleed them. For now I'm running the non painted calipers, with the painted brackets.
Sits just fine with the stock 16" Sport Wheels. So how does it feel? Good. I scuffed off most of the rust on that rotor. The pads will eat off what's left. The rotors are straight, no wobble. This whole effort was to see what the difference was between these two sets of rotors, calipers, and brackets. I wanted to work out what was interchangeable. The budget here was very low, obviously, however, the results are tangible.
BMW designed the braking system well in the E36 and E46. For me, if I can get parts in a newer design, that a little better, for just a few more dollars, I'll give it a shot. In this case this whole project cost me about $35, not including my time. Easily more for after market rotors, pads, ect but, now I can look into those avenues knowing that it will all work even better.
BMW designed the braking system well in the E36 and E46. For me, if I can get parts in a newer design, that a little better, for just a few more dollars, I'll give it a shot. In this case this whole project cost me about $35, not including my time. Easily more for after market rotors, pads, ect but, now I can look into those avenues knowing that it will all work even better.


